

As part of my 10 Apps to up your Instagram Game series, this week I going to share with you a great app that you can use to make Cinemagraphs on your phone (I actually going to show you two app, one better than the other in my opinion)!
Just incase you don't know a Cinemagraph is, its a still photograph that has movement in just a section of the image, which in turn create a video clip. The video clip is usually a small movement played on a loop. I have created a Cinemagraphs over om my Instagram and they are honestly so fun!
There are probably hundreds of apps out there that you can create these on, but these are my favourites, Vimage and Lumyer. So we also have a little Vimage and Lumyer comparison, read on to see which I think is better.
Vimage
Available on IPhone and Andriod
So Vimage is definitely my favourite as it is really easy to use and I think the quality is better. It is a free app but you can pay for the Pro version for addition features.
Step 1
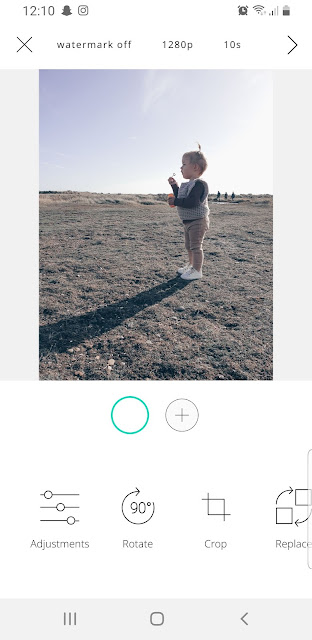
Once the app is open, select the '+' to select the picture you want to add the effect to. You can use their stock images or select 'Gallery' to choose one of your own. Once uploaded it will look something like this:
Step 2
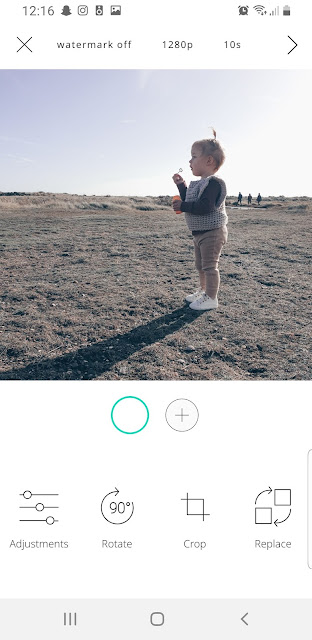
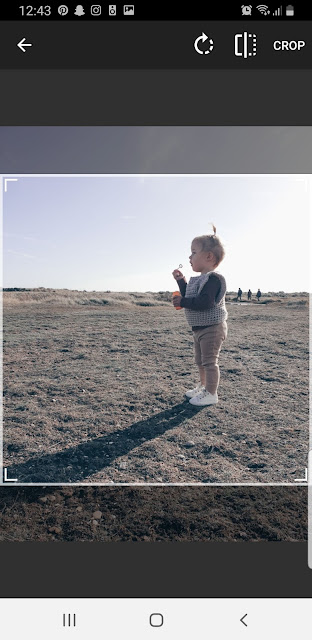
The first thing I always do is crop the image. If you are wanting to upload the cimenagraph to Instagram then you will need to crop it to square, as currently feed videos have to be square. If you forget the crop stage and post to Instagram, Instagram will automatically crop the video for you, but if you do it here first of you can control the crop, say if you want more background or foreground. So once you have cropped, click the tick and you will be brought back to the main editing page.
Step 3
Here select the '+' in the centre and it will bring up 4 options: Effect, Animator, Mask or Text. So text is self explanatory, and Animator is a whole other ball game for another day! Effect is what we need to create the cinemegraph and Mask you can use to shield part of the image you don't want any movement. Mask not always necessary but often used when you want an effect that will take up a lots of the image and you don't want it on a certain part. For example, say you have a window image and you wanted to add the rain effect, you would use the mask to brush over the parts you didn't want the rain on, like the inside windowsill or walls.
Step 4
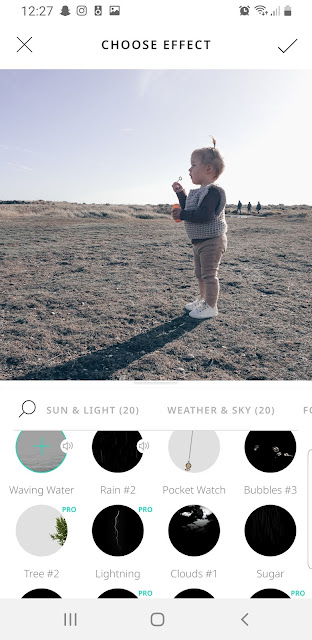
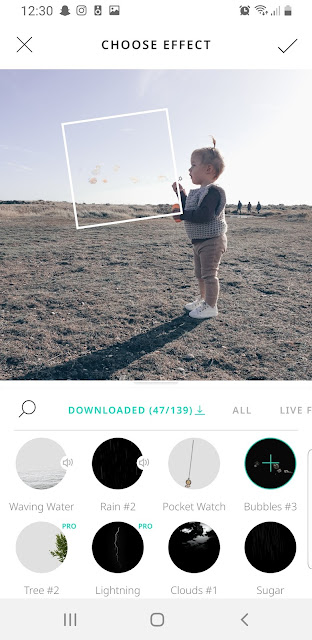
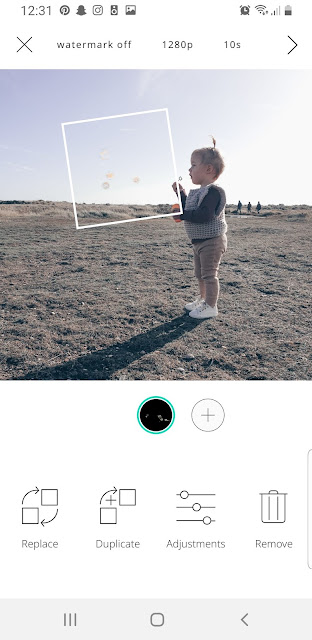
Anyway, once you have selected 'effect' it will bring you to all the effects they have. You can search for a particular one or just browse for the one you want using the titles. I wanted bubbles for this photo, but when you are new to the app, its fun just to have a play with the different effects. Once you find the effect you like, click to download it. The effect will then appear in a square. Move the square to position the effect where you want it and use two fingers to increase or decrease the size. Once you happy select the tick.
Step 5
This will bring you back to the main editing page. It will show 4 options: Replace, Duplicate, Adjustments and Remove. All again self explanatory. In the adjust section you can edit the speed and the opacity of the effect. I always like to take the opacity down a tad to look a little more real to life. There are other adjustments such as brightness, saturation and contrast, but I tend not to use these. Once finished with you adjustments, click the tick.
Step 6
Unless you want to add another effect then you are done. Click the '+' again to add another effect or if your done, select the arrow in the top right hand corner. Vimage will then create you cinemagraph, sometimes it takes a few seconds. You can then save or share the video clip. All done.
Lumyer
Available on IPhone and Android
This app is OK but I find it more difficult to navigate around the app and sometimes I find the finished results lose the quality of your original image. But nevertheless, I do use this app on occasions and have posted created cinemagraphs to Instagram. The app itself is free but you have to pay for the effects, which usually come in packages but I think you can buy them individually. They are really inexpensive to buy and they do have ceratin free ones. I think the basics, like steam, bubbles and bird are free.
Step 1
So when you open the app, click the '+' to add your image. Lumyer will then make you crop the image to square straigt away.
Step 2
You then have to scroll across the certain packages to find the effect you want. And when you select a package you can see what is included in that package, but cant sample it on your image. You can then select download to download the package or the individual effect or buy if it is one you have to purchase. Once a pack is downloaded you then have to scroll across the packages again to find it (which I find really annoying). To add it you click to select it and then select again to move on to the further effects in that package.
When browsing packages and you have clicked it to view it, it takes you back to the beginning which again I find really annoying!
You can click the 'FX' icon in the bottom right hand corner to browse the effects, but unless I just cant find it you can not search for an effect, so its just a case of looking through them all until you find one you like, again this is too annoying for me.
Step 3
Once you have found an effect you like (finally, it takes ages), it will add this in a square and again you can use your two fingers to resize and to position it in place. Once you are happy click Save. Again this will take a few seconds but that's it. You can not edit the effect or add an additional one like you can in Vimage.
Vimage Vs Lumyer
In my opinion Vimge is so much better. Its just so much easier to use and the quality is better. There are a lot more editing options on Vimage too, I find Lumyer quite basic. However Lumyer does have a more effects, although they are not necessarily better.


Vimage Lumyer
Tip: If you are planning on posting your cinemagraph to Instagram remember to crop to a square as feed videos need to be square.
Pin now, read later...
Pin now, read later...

This post is part of my 10 Apps to up your Instagram Game series. See previous posts on other apps below and next week I will be posting another!
Pin now, read later...

0 comments