

Everyday I find myself falling more and more in love with photography. I love taking photos, especially of my baby Lake! Professional cake smash photos are incredible and while I will never live up to their standards why would I pay for someone to do something I love, something I would love to do!
Cake smashes are usually for a child's first birthday and it's such a personal, memorable and fun experience, so it was definitely something I wanted to have a go at myself. And I would highly recommend you do the same. For one its 90% cheaper, but mainly it is so much more intimate and enjoyable. You can invite whoever you like to come along (and eat some smashed up cake afterwards lol). We kind of had a little party and it was amazing!
Like I said I am in now way a professional but I wanted to share my top tips on how you can do your own cake smash.
SET UP
Firstly you need to have a area big enough to do the cake smash. We didn't, so I created one. I rearranged our dining area so I could use the floor space and wall as a back ground. Our wall here is white, so it was ideal.
Ideally you will need a decent amount of floor space and a plain background, if you don't have a wall to use you could create one. You could use a blanket to create a wall or place a blanket over the wall if your wall is not 'background ready'.
Your floor space will also need to be plain, so again, a white blanket is perfect. If you have a blanket big enough you could use this was the background and floor all in one for a smoother finish. This is what I originally wanted to do but didn't have one big enough. Which brings me on to my next tip, you have to work with what you have got. I would recommend you practice arranging your set up prior to the cake smash so you can trial and error how you like it. See what works and what doesn't. Also this way you can be ready when you baby is ready, because babies don't usually like to wait around!
LIGHTING
Natural light will be best so if you can try to have your set up in a place where you have light. For us, I don't really have great natural lighting in our house so I used a soft box lighting. I had these anyway as I use them for most of my photographs. These are the lights I used if you are interested. I just had these pointing at the set up.
PROPS
You can tailor the props and use whatever props you like. Try to colour coordinate if you can. Think ballons, tissue pom poms,garlands, flowers etc. But like I said, use what you like or what you already have. I used ballons and tissue paper decorations as they where really inexpensive and easy to get hold of. Again play around with your props until you have a set up you like. Take a couple of practice shots so you can see how they work. As I used a wall with a white blanket on the floor, I used a row of ballons to try and cover the skirting boards, as I didn't want them in shot. Try to keep it simple and don't use too much so you don't clutter your photos. This was a shot of our full set up.

THE CAKE
Luckily my mum is an excellent baker, so she make the cake for Lake. I would recommend you keep the cake fairly simple. Keep it to one tier. Have a soft outing, such as buttercream, so your baby can get stuck in! We placed the cake on a cake stand and placed a book underneath the blanket for the stand to stand on so it would be more sturdy and not fall over.
YOUR BABY
So your set up is ready and your cake is ready but is your baby ready? Work around your little one, make sure they nice and awake, we timed the smash for not longer after Lake's afternoon nap. If they are not in the mood, wait. Try again in a while.
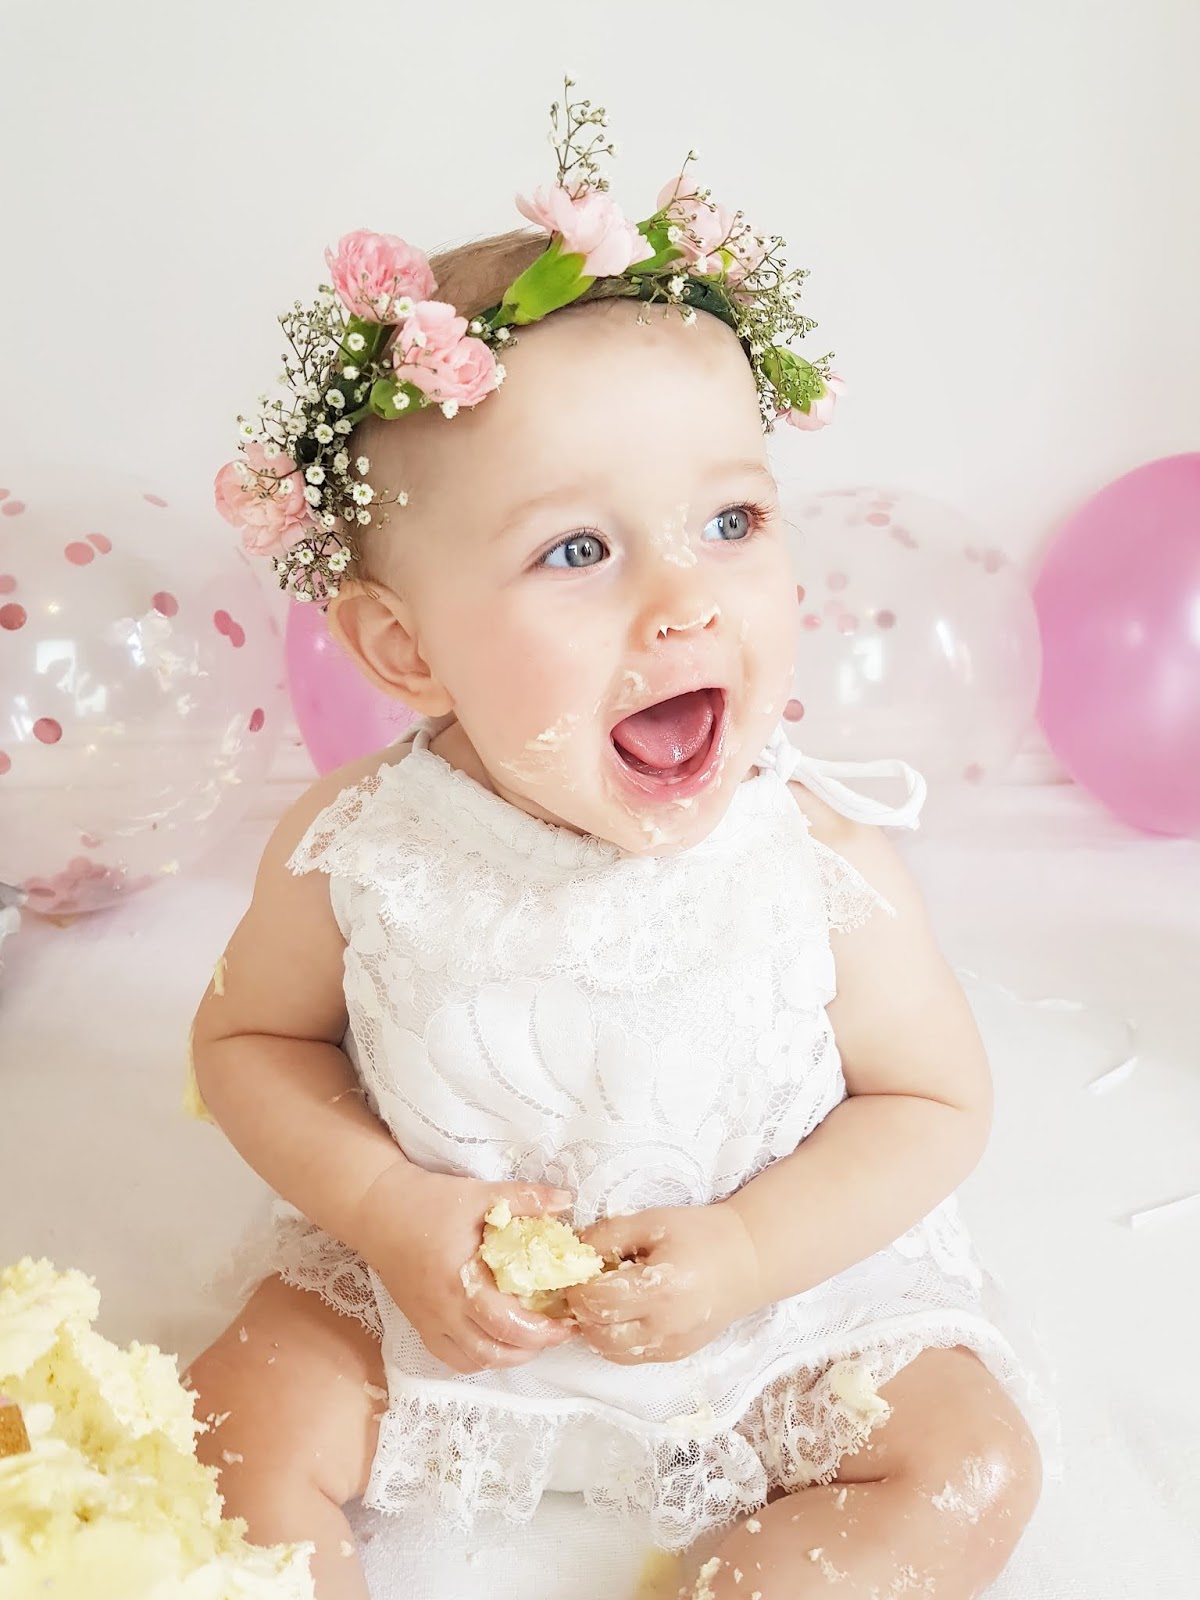
The outfit. No advice on this really as you obviously can dress your baby in whatever you like. I picked a plain white lace romper for Lake and a floral head dress. I actually made the head dress myself, I absolutely love it. I have a post here on how to make this if you at all fancy.
THE SHOOT
Go time. If you have an amazing camera, great. I don't. I used my phone, I use my phone for all my photos. It is the Samsung Galaxy S8. And to be honest, your phone you will work just fine. Phone camera's are great now so without a doubt you can use your phone.
Place your baby in your set up and start shooting. I would try and have some help, have someone there who knows your baby, who can get their attention while you are taking photos. They can try and get them to smile. Let them play with the cake and see what happens.
Lake started by just putting her fingers in the buttercream and licking her fingers. After taking a few shots we broke the cake up a tiny bit then Lake started to eat little pieces. After a while she was eating big handfuls!
Move around a try and take pictures from lots of different angles, close ups, far away shoots, shots to the side, birds eye shots. Just take lots and lots. You can always delete any photos that haven't worked.
THE CLEAN UP
Yep, once it is all over the clean up is a nightmare! We had cake everywhere! Totally worth it though!
EDITING
Try to keep editing to a minimum. If you have everything set up correctly and you have prepared you won't really need to do much editing. All I did was brighten my photos a little, as like I said my lighting is not great. I use Snapseed to edit my photos. I am planning on creating a post soon on how I edit my photos, so keep an eye out for that if you are interested.
HAVE FUN
The main thing to remember is to enjoy yourself and have fun. Make this an amazing experience and memory for you and your little one. Don't worry too much about what your photos will be like as no matter how they turn out you will have the memories forever!


0 comments