

I always use my phone, always. I don't even own a camera. One day I'll probably get a camera and most likely be blown away by how good it is but for now I think my phone does a pretty good job. Most modern smarts phone do to be fair. I use the Samsung Galaxy S8, which I bevel has a 12mp camera. I honestly can not fault this camera. I have actually since upgraded to the Samsung Galaxy S9, however I still use the S8 for photos because I just find it better. When I'm taking indoor shots I usually use soft box lighting as the lighting in my house is terrible! These are the ones I use.
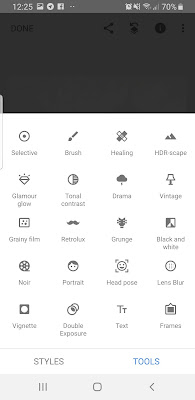
Obviously how much and what I edit will depend on the original photo, but like I said I always do the same few steps no matter what and these are the steps explained below. I always use Snapseed, which it totally free for Android and IPhones. I have played about with other apps, but in my opinion nothing compares.
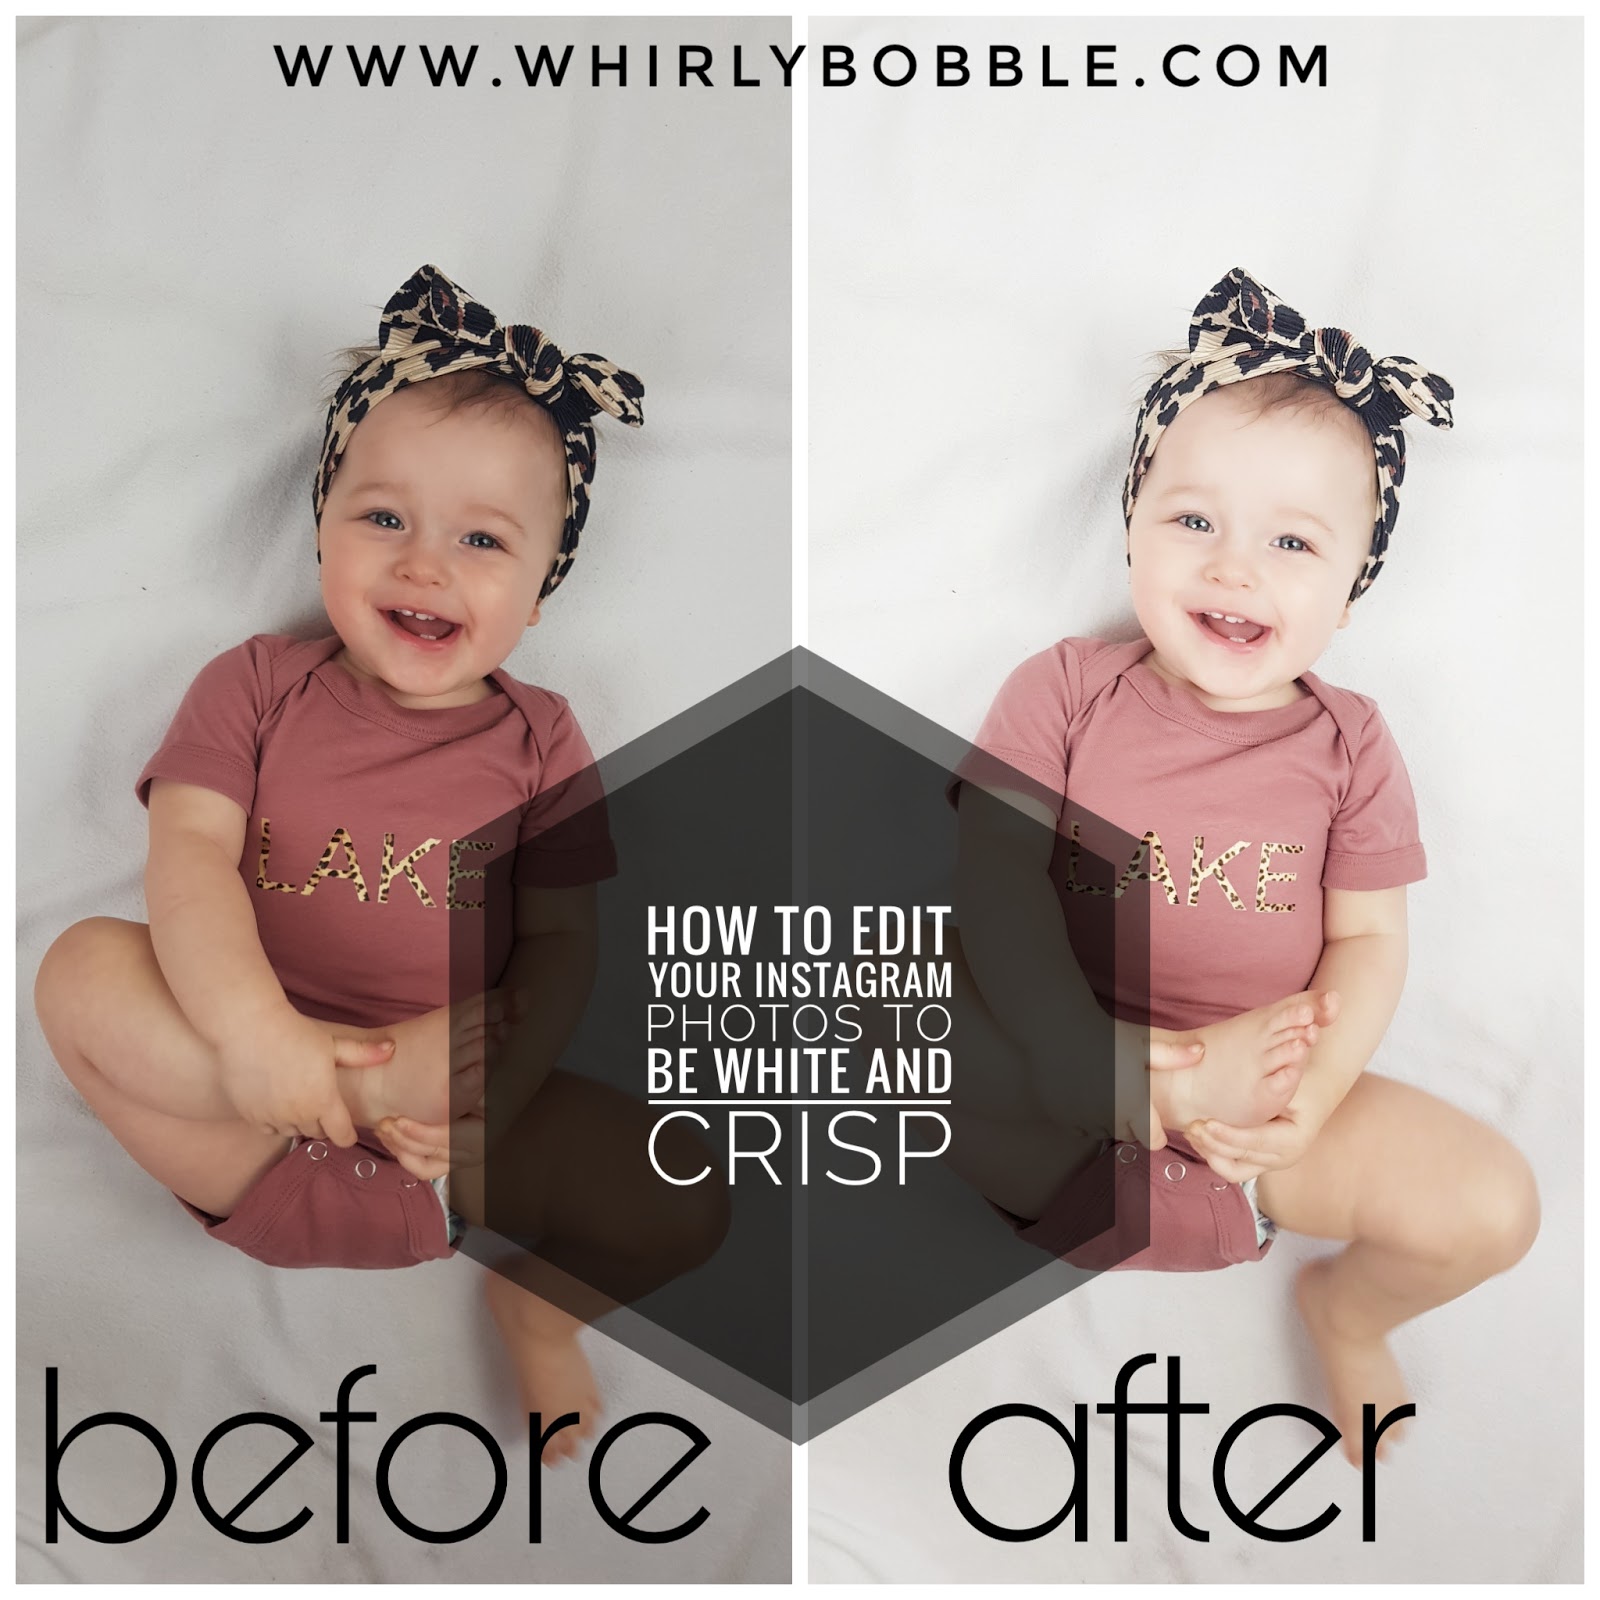
Step 1: The first thing I will do is to rotate and crop the image if needed. This image didn't need either. Also, I never crop to square for Instagram either, I'll always keep them rectangle.
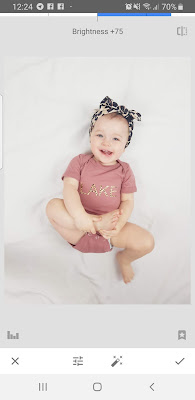
Step 2: Brighten. To do this select tools, then tune image. Then scroll your finger right and left to turn the brightness up and down. I love bright images. I don't have a particular amount I brighten, it will depend on the image. I just scroll back and forth until I am happy with the brightness, its usually quite a lot though! This particular image was brightness +75 (see images below).
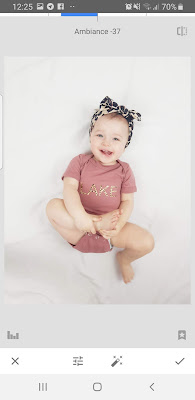
Step 3: Ambiance. Still in tune image, scroll your finger up to select Ambiance. Again use your finger and scroll left and right to turn the ambiance up or down. I turn the ambiance down. In this image the ambiance were -37.
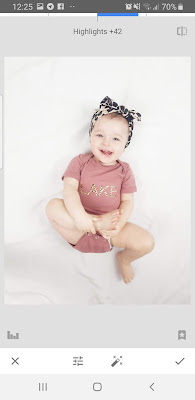
Step 4: Highlights. I also like to turn the highlights up. Again still in tune image, scroll to highlights and turn up or down in the same way. In this image the highlights were +42.
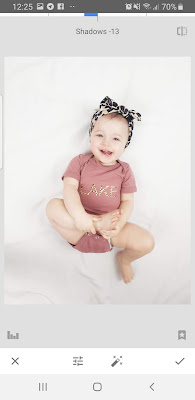
Step 5: Shadows. Still in tune image and adjusting in the same way, I turn the shadows down (which actually darkens the shadows, I only do this very slightly. This image the shadows were -13.
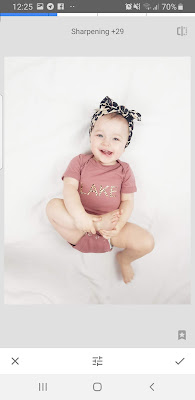
Step 6: Sharpness.I always sharpen the image just a little bit. To access the sharpening, select tools, then details. Scroll down to Sharpening. Scroll right and left o turn the sharpness up and down. This image was +29.
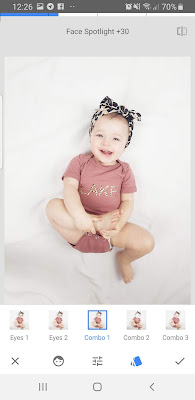
And that is literally it. Its so simple and really is super quick to do. I do just want to mention the portrait tool in Snapseed too. I rarely use this, as I find its not really needed on pictures of Lake (but I do use it on pictures of myself) but it smooths the face and brightens the eyes. To use this, select Portrait, then click to select a combo. I have shown this as an example below. If I use this I will go for Combo 1.
Filters.
Snapseed does have filters I believe but I don't use them. I don't often use filters at all, as after the editing I don't think its needed. However if I do use a filter, it will be in VSCO. I will use A5 but then turn it down to just over half way (see below). This filter adds a cooler tone to the image which I like and eliminates any yellow tones. Below is the image with and without the A5 filter.


I have just added a few more examples below. These images are all edited in the same way.


I would love to hear your thoughts. Feel free to drop me a message on Instagram.
Fancy helping a girl out? I'd love it if you could Pin the above image!
* Post Contains Affiliate Links
Beautiful pictures you have got captured. I am impressed when seeing this post. Keep continuing guy.
ReplyDelete